Health And Safety Tips And Advice For Residential Painting

Becoming a Professional Painter.

Why would anybody want to become a painter? Why should young men or women even consider employment in the trades? These are both valid questions stemming from incorrect assumptions that young people have about the trades. Let’s examine why being a painter or working in trades is a great career choice based on some undisputable facts.

Unemployment rates of University and College graduates are high,

Many graduates that are working, have jobs not related to their field of study.

Almost every student graduating is burdened with thousands of dollars worth of student loans. This is not an ideal way for young men or women to start their working life.

Learning a trade does not mean that you don’t have what it takes to complete College or University. You can be intelligent and still choose to make your living with your hands. In fact, more and more young men and women end up working in trades after getting another degree. We see this in our company all the time. Our average painter or job manager has some College or University education.

What Does a Painter Do?

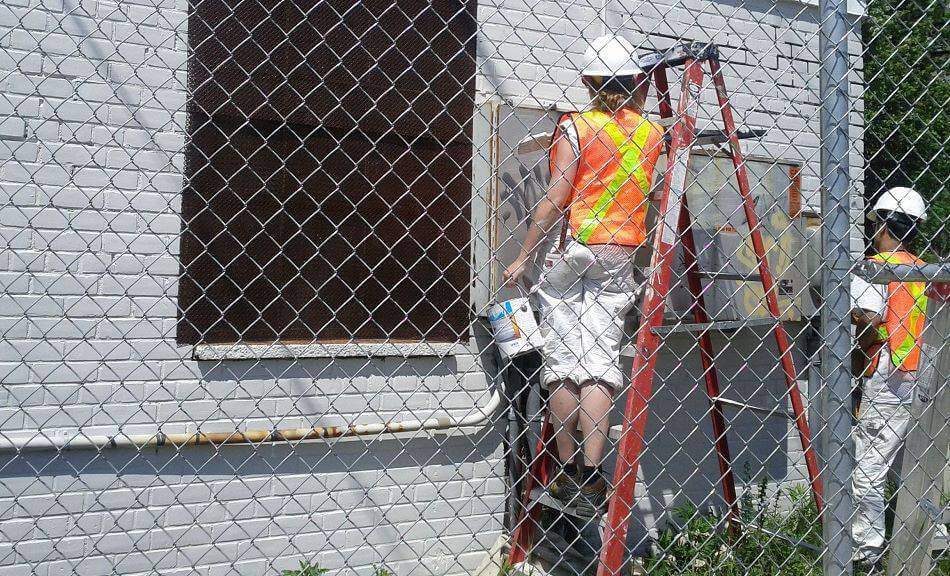
Painters prepare surfaces and apply coatings mostly for protective and decorative purposes. These surfaces can be wood, drywall, plaster, concrete, steel etc. Interior surfaces are inside commercial or residential buildings such as homes, offices, factories, institutions and other facilities. Exteriors of homes, buildings and other structures are mainly painted to protect them from the weather elements. Coatings come in many colours and can also be used to decorate and beautify.

How Does someone Become a Painter?

Some painters learn their skills working for companies mostly under the wing of more experienced painters. It takes a painter at least 2 or 3 years to acquire most of the relevant and useful skills a company uses. It’s a good idea to ask a contractor you want to work for if they have a training program

Things To Do After You Finish A Painting

It’s a great feeling once you finish a painting which you have long worked on and you are satisfied with the result. But your work does not finish there. There are a number of tasks which I recommend you do once you finish a painting.

Consider if it is actually finished

Knowing when to put the brush down and calling it finished is a skill on its own. There are many times when I have considered a painting finished, only to get the paints out again, later on, to fix up something that was annoying me or an error which revealed itself.

Sign your painting

Signing your painting should be the last time your brush touches that canvas. Of course there will be times when you need to fix something up, but in general, your signature should be your last stroke.

Name your painting

You don’t need to get all deep and meaningful with your naming. It could merely describe what you have painted. That is how I have named most of my paintings.

Photograph your painting

This topic deserves an entire post. Photographing your painting will feel like it is the bane of your existence as an artist.

Interior & Exterior Painting

If you need your home or business made over with a fresh coat of paint, there’s no better time to plan than now.

Interior Painting

A perfect interior painting job has many factors. One of the main factors that can help achieve that flawless look is a consistent and thorough application of quality paint. Great things happen when the best painting materials (along with years of experience) are utilized for your interior modification ideas!
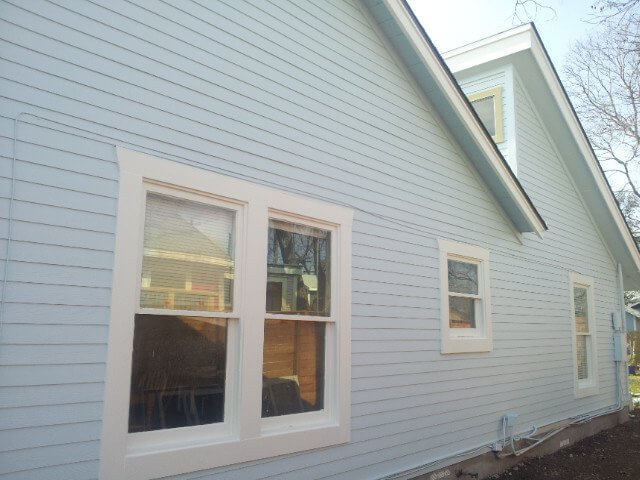
Exterior Painting

Depending on the size of your property, exterior painting can be a multi-step process. We invite you to look at our examples of exterior painting. We think you’ll feel confident in our high level of detail and quality

Residential Painting

residential painting professionals are detail-oriented, and we understand the value of delivering quality work on time and within your budget, so you can get back to living in your home as soon as possible.

Commercial Painting

Commercial painting work can have higher stakes: budgets can be strict and schedules can be tight, sometimes even more so than for residential jobs.

Tips on How to Paint Over a Painted Wall

One of the most effective ways to breathe life onto your home exterior or interior is a fresh paint job. A new coat of paint makes things not only brighter but makes the house or business property more appealing. While the prospects are exciting, many people are often caught in a rut when considering painting over an already painted wall.

Wash

Grease, dust, and grime will collect on any wall external or internal. Before applying a fresh coat, some scrubbing and wiping are necessary. If you paint on a dirty wall, ugly bumps and streaks will appear, causing an ugly result on something you were trying to spruce up. Cleaning the walls makes it much easier to apply paint.

Prime

Before repainting, use a primer to create a barrier between the old coat of paint and your new paint. Another benefit of priming is that it creates a porous surface that gives the wall a more finished look. Avoid choosing paints with built-in primer, as they are not effective on a wall with the old paint. Such products may work if you are painting the same color but if you are making a dramatic color change, a good oil-based primer is important. It is easy to prime a wall using a thick roller brush. Do not skimp on the primer, as it will not be seen once you have painted. If you can still see the old color through the first coat of primer, it means another coat is needed. You will need a thicker coat of primer if the old coat was a darker color. Remember, there are many types of priming products available so you will need to take your time comparing to find the best.
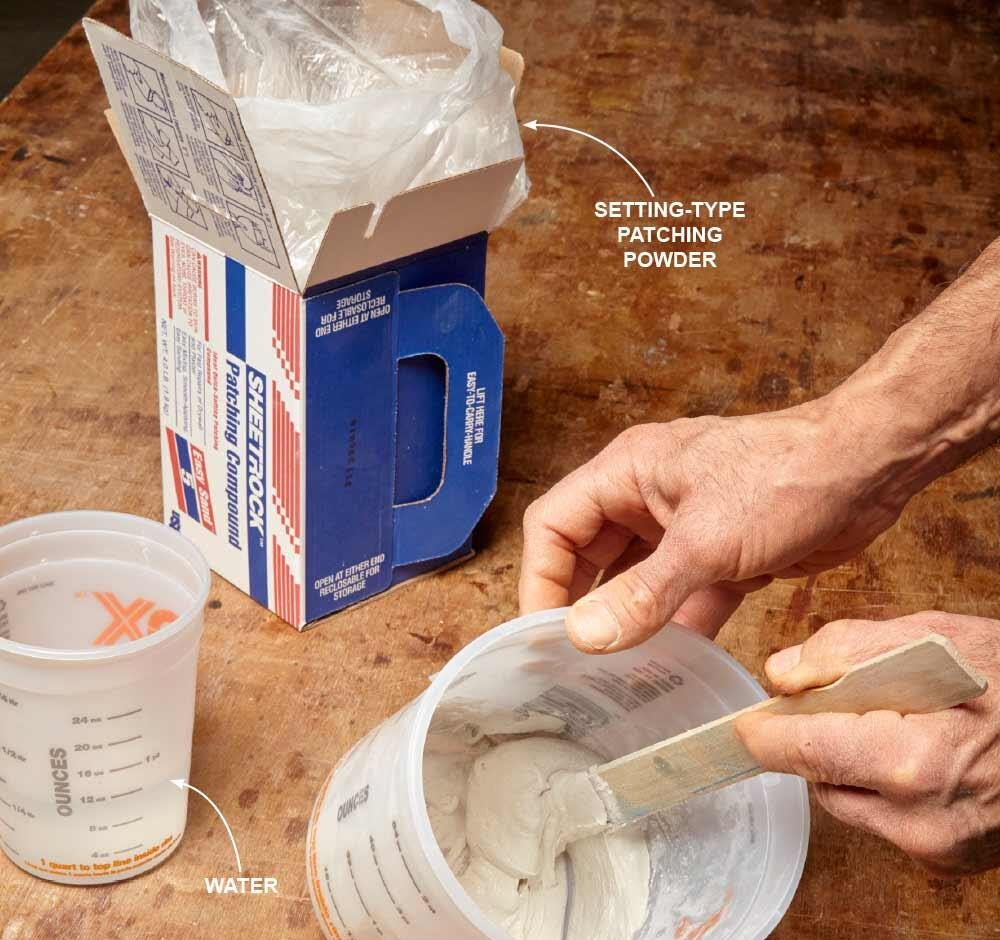
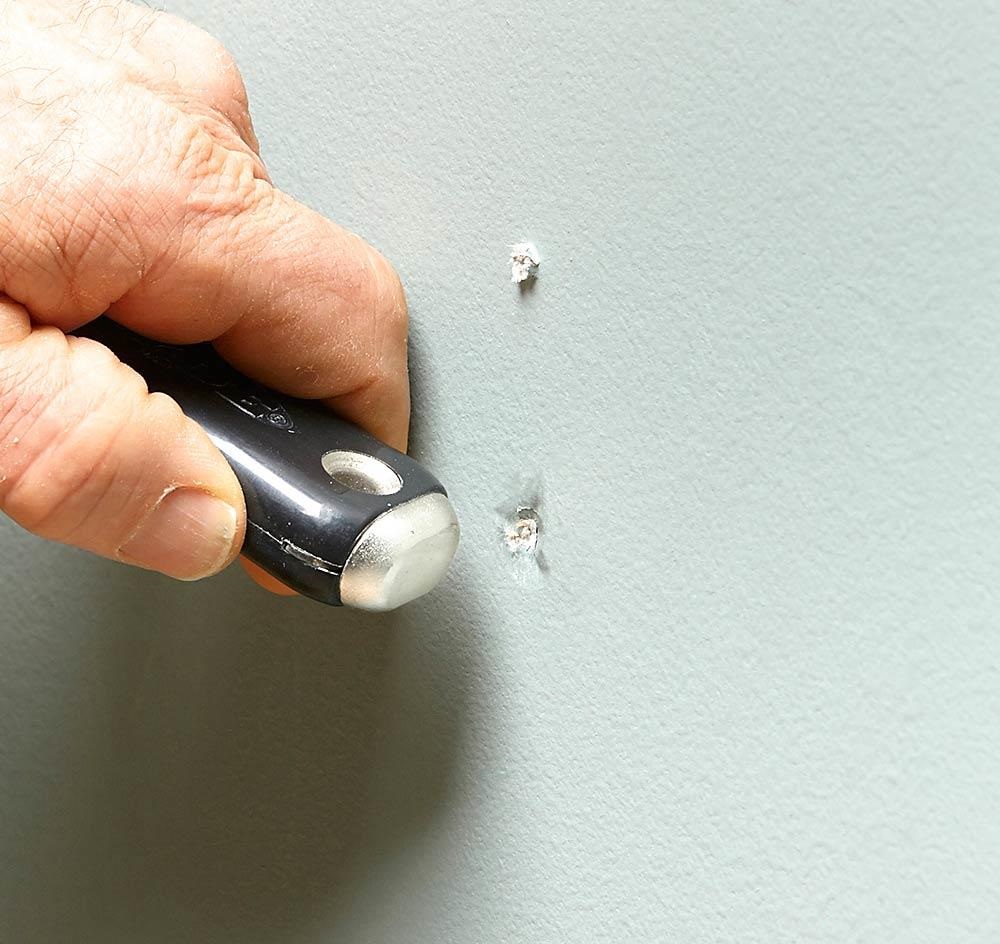
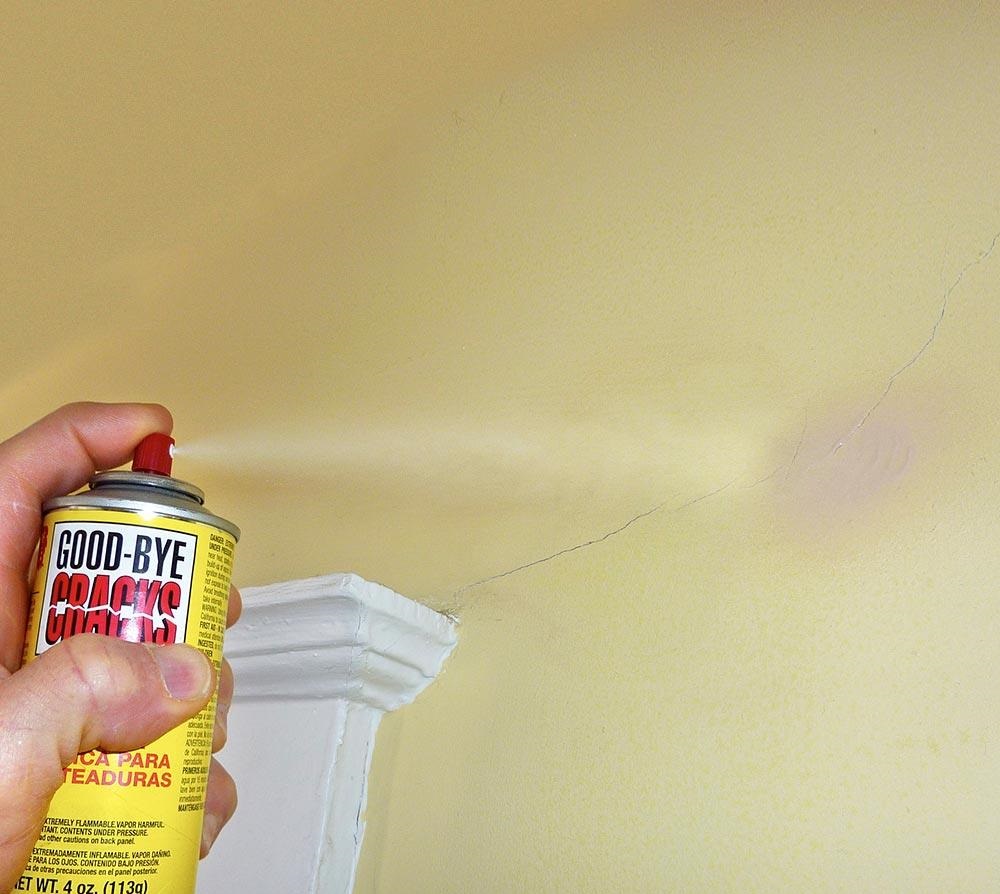
Fill and Sand

If it is an old wall, there may be some holes and cracks that need filling. To do this you need to purchase a filler and correctly apply it over the cracks and holes. After this, a thorough sanding is necessary to keep the surface smooth and even in readiness for the new color. Remember; bigger holes may need filling more than once to ensure that the surface is smooth and consistent. Some people think of filling and sanding as too big of a hassle but skipping this step only compromises the new paint job.

Repaint

After washing, priming and filing you are ready to start painting the new color. Choose your new color wisely and have all the right tools in place to achieve guaranteed good results. Depending on the wall, you will need more than one coat of paint to achieve a good finish. When you are done with the first coat, leave sufficient time for it to dry before applying the next one. We recommend waiting at least two hours before applying the next coat. If you are painting the same color as the old one, a single coat might be enough but if you are going with a different shade, use more than one coat. When shopping for paint, make sure to buy an extra can just in case you run out.

KEY QUESTIONS TO ASK YOUR PAINTING CONTRACTOR

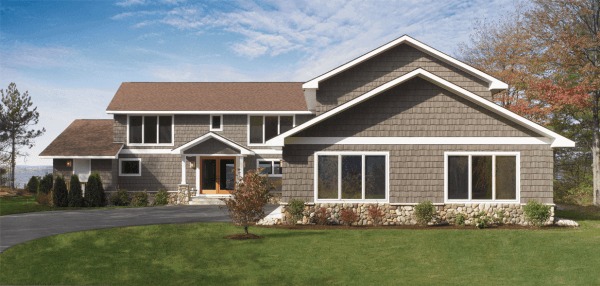
The way a home looks says a great deal about the person living in that home, and most homeowners wish to make a good impression.  One way to achieve that is by giving a home a new paint job. Even more than that, the curb appeal of a home, that is, the first impression someone has of a home when simply driving by, can affect a home’s value and how quickly a home sells once it is put on the market

In addition to all of that, a good paint job also helps to protect a home from the potential ravages of weather, protecting and preserving wood and other materials.  For all of these reasons and others, it is important for a homeowner to choose not just a painting contractor who will do an acceptable job of painting a home, but one who will do a masterful job.

Do you have a list of customers who would be willing to verify the quality of your work?

Any painting contractor worth his lacquer should be able to supply a list of homes that he or she has recently painted and allow potential customers to speak with homeowners who have had first-hand experience working with the contractor.  Be slightly skeptical if only a very small number of homeowners are available to speak with, as they could be the contractor’s next door neighbor, sister-in-law or other “ringers.”

Do you cover all of your employees with Workman’s Compensation Insurance?

If a worker is hurt while on a customer’s property, the homeowner could be held financial liable if the contractor does not have sufficient insurance to cover each and every worker.  Ask a contractor if he or she has worker’s compensation; ask to see a copy of both the contractor’s General Liability coverage as well as their Workman’s Compensation policy.

How will my house be prepped for painting?

This is an important question and it is just as important that a contract provides a detailed answer and not offer vague generalities.  Have the contractor put the entire process of preparation in writing and make certain that he or she dates and signs it.  Holes and bad spots in walls must be repaired.  All surfaces to be painted must be scraped and/or sanded to remove as much of the old paint as possible.  Ask how many people will be part of the preparation process.  For homeowners who are unaware of it, preparation is equally as important as the painting process itself.

The Complete Drywall Repairs Installation And Taping Guide

Tips for Working with Drywall

We’ve hung and patched and primed and finished our fair share of drywall. Check out this compilation of tips for working with drywall to make your next build or repair easier.

Use Setting Compound for Big Holes

It’s fine to fill screw holes and other small wall dings with patching compound, but for dime-size and larger drywall repairs, and for holes that are deep, it’s best to use a joint compound that sets up by a chemical reaction. These are available in powder form with setting times ranging from five to 90 minutes. The reaction starts when you mix in the water, and the compound hardens in the specified time. The five-minute version is nice because you can buy the powder in a convenient 5-lb. box, and the compound hardens quickly, so you can apply another coat right away. Remember, setting-type compounds are harder to sand than regular patching materials, so make sure to strike them off flush to the surface when you fill the hole. You’ll find setting-type compounds wherever drywall taping supplies are sold.

Make a Dent for the Patching Compound

When you remove a nail, drywall anchor or picture hanger, there is usually a little ridge of old paint or drywall sticking out that’s hard to cover with patching material. The solution is to make a dent over the hole, and then fill the dent. Most good-quality putty knives have a rounded hard plastic or brass end on the handle that works perfectly for making the dent. The rounded end of a screwdriver handle or the handle of a utility knife will also work. Press the handle against the hole and twist it slightly while applying pressure to dent the surface, or if you have good aim, use your denting tool like a hammer.

Cover Cracks with Repair Spray

Stress cracks usually show up around window and door openings. The cracks are the result of framing movement and are hard to fix permanently. But using spray-on crack repair is a good way to at least extend the life of your repair. The spray forms a flexible membrane over the crack that can stretch and relax as the building moves.

Rent a Drywall Lift for Ceiling Work

If you have to drywall a ceiling, don’t hesitate to rent a lift. It’s well worth the daily rental fee and is by far the best way to get a ceiling up without back strain.

Choosing the Best Type of Drywall Compound

Drywall mud, also called joint compound, is a gypsum-based paste used to finish drywall joints and corners in new drywall installations. It’s also handy for repairing cracks and holes in existing drywall and plaster surfaces. Drywall mud comes in four basic types, and each has its advantages and disadvantages. You may choose one type for your project or use a combination of compounds for the desired results

All-Purpose Compound: Best All-Around Drywall Mud

All-purpose compound is a pre-mixed mud sold in buckets and boxes. It can be used for all phases of drywall finishing: embedding joint tape and filler and finish coats, as well as for texturing and skim-coating. Because it is lightweight and has a slow drying time, it’s very easy to work with and is the preferred option for DIYers for coating the first three layers over drywall joints. However, an all-purpose compound is not as strong as other types, such as topping compound.

Topping Compound: Best Mud for Final Coats

Topping compound is the ideal mud to use after the first two coats of taping compound have been applied to a taped drywall joint. Topping compound is a low-shrinking compound that goes on smoothly and offers a very strong bond. It is also highly workable. Topping compound typically is sold in dry powder that you mix with water. This does make it less convenient than premixed compound, but it allows you to mix just as much as you need; you can save the rest of the dry powder for future use.

Taping Compound: Best for Applying Tape and Covering Plaster Cracks

True to its name, a taping compound is ideal for embedding joint tape for the first phase of finishing drywall joints. Taping compound dries harder and is more difficult to sand than all-purpose and topping compounds. Taping compound is also the best option if you need to cover plaster cracks and when superior bonding and crack-resistance are required, such as around door and window openings (which tend to crack due to house settling). It is also the best mud option for laminating drywall panels in multi-layer partitions and ceilings.

Quick-Setting Compound: Best When Time Is Critical

Commonly called “hot mud,” quick-setting compound is ideal when you need to finish a job quickly or when you want to apply multiple coats on the same day. Sometimes called simply “setting compound,” this form is also useful for filling deep cracks and holes in drywall and plaster, where drying time can become an issue. If you are working in an area with high humidity, you might want to use this compound to ensure a proper drywall finish. It sets by chemical reaction, rather than simple evaporation of water, as is the case with other compounds. This means that quick-setting compound will set in damp conditions.

HOW TO REPAIR A HOLE IN DRYWALL

Drywall repair is a common home maintenance task that many homeowners can do themselves. The skill set, tools and techniques required for drywall repair depend on the size of the hole. If you can flip a fried egg, you can easily patch a small nick in your drywall, but it gets trickier as the holes get bigger. But don’t worry; Mr. Handyman is here to help!

Drywall Repair Techniques

The size of the hole will determine what method of repair you’ll use. You may not need all of these tools – before you purchase anything, reference the guidelines below to see what you’ll need. You’ll find the required materials listed with each step. Drywall tape is available in paper or mesh, select mesh if you have a choice. The tools in bold are required for each step, regardless of hole size.

HOW TO PATCH A SMALL HOLE (ANYTHING SMALLER THAN A NICKEL)

Small holes in drywall are simple to fix. Any hole larger than a nickel should be repaired with the instructions under Medium or Large hole. Use spackle or joint compound to fill the hole. If you’re using joint compound, buy it pre-mixed for small DIY jobs. Spackle may shrink as it dries in larger holes and may require an extra application. Joint compound may run out or bulge as it sets and will require sanding and a second application.

HOW TO PATCH A MEDIUM HOLE (ANYTHING SMALLER THAN SIX INCHES)

For a professional finish follow the instructions under Large hole. This method requires finesse to feather the joint compound into the rest of the wall – if not done correctly, you will see a slight bulge in the wall. You must feather the repair area (gradually reduce the thickness outward) when applying the joint compound and in the sanding stage. Use a drywall patch that is slightly larger than the hole that needs to be repaired. You can purchase these at your local hardware store. Look for a kit, which will include everything you need.

HOW TO PATCH A LARGE HOLE (ANYTHING LARGER THAN SIX INCHES)

Take your time, and be careful not to nick any wires or plumbing during installation. Although this method requires more tools, the final result is more professional looking.

Everything You Need to Know About Drywall

Choosing the right drywall

To hang and finish drywall, you need drywall sheets, joint compound, tape, fasteners and edge treatments. That seems straight­forward, but when you’re standing in the drywall aisle at the home center, the choices aren’t so simple.

Is drywall fire-resistant?

“Type X” drywall is 5/8 in. thick and designed to slow the spread of fire. It is often required on garage walls and ceilings that adjoin living spaces, ceilings between living spaces inside the house, and under stairs.

Is drywall mold and moisture resistant?

Also called “greenboard”, mold-and-mildew-resistant 1/2-in. drywall is a somewhat different animal. Manu­facturers use various methods to eliminate or treat the paper that covers the gypsum core. Getting rid of the organic paper food source was supposed to keep mold and mildew from growing. Builders used to install it in wet and damp locations, placing it behind tile in shower and bath enclosures. Those enclosures have already been or soon will be replaced as the greenboard fails.

Half-inch drywall

1/2-in. drywall is the best choice for most walls and some ceilings. There are standard and lightweight versions. Lightweight is stronger and weighs 25 percent less

3/8-in. and ¼-in. drywall

If you’re doing repairs in a house that was built in the ‘50s or ‘60s, you may very well have 3/8-in. drywall. You’ll want to match that thickness to patch an existing wall. Measure the existing drywall or take off a switch plate cover to find out.

Tips For Hiring a Drywall Contractor

Like painting, drywalling is a very labor-intensive technique. In addition the drywall installer and taper has to be skilled because any imperfections will be picked up long after the painters have left. This is why a great emphasis should be placed on hiring the right drywall contractor for the job.

Drywalling is actually two separate jobs. The first part is the sheetrock installation which entails cutting, shaping, putting the panels into place and then fastening them. The second part includes taping the seams and then sealing both these and the screw heads with drywall compound. This latter process revolves around coating and sanding these surfaces until the walls and corners are smooth and you can’t tell where one sheet begins and the other ends.

Preparation

If you take a look at a finished wall in any home it looks like a seamless flow of color which is only interrupted by the corners. And these looked like they have been hewed from a single block with a precision saw blade. Only your previous knowledge of building will tell you differently. However, the drywall job is only as good as the framework to which it is fastened.

Hiring the Drywall Contractor

As nothing is more infuriating to a homeowner than to see bulges and rifts on a finished wall you can’t hire just anyone to drywall your home. There are ways to find out the ones who will do the best job. A drywalling company can cost in the realm of $25 to $45 per hour per person for sheetrock installation and drywall taping so they are not cheap

Finding a Contractor

This can be accomplished through a variety of places like the internet, home building stores and word-of-mouth. Usually home building places are good because they know the credit history of all the contractors and can give you an idea of who is trustworthy. Web sites like HandyAmerican.com can provide you with detailed information about contractors rated and reviewed by your neighbors.